Happy Valentine's Day! A few days late.
Truthfully we don't usually do much for Valentine's Day, but since this is our first year homeschooling, my little man was bummed about missing out on all the little holiday parties. It is the only thing he has complained about since we started this adventure. So I try to do something each holiday to have a little "party", that still involves learning. So for Valentine's day my little munchkin invented a cookie recipe that he wanted to make for his Nana. I also made a special breakfast for my boys and since it is never fun to actually go out to dinner on Valentine's night, unless you like waiting an hour in line to sit down to wait even longer for an overpriced dinner, we made a special at home dinner.
For breakfast I made eggs in a basket. Munchkin actually eats this almost everyday for breakfast but instead of using my normal round biscuit cutter to cut out the center I used a heart cookie cutter. You cut the shape into the center of a piece of bread. Butter the bread on both sides or just lightly spray you pan with non-stick spray. Lay the bread into a hot pan (I used my flat electric griddle) crack an egg into the center and wait. Flip it over and continue to cook until egg reaches desired doneness. Munchkin likes his egg over easy, if that yolk is cooked too much he won't touch it. My husband and I like ours more over medium.


The night before Valentine's day we made the dough for the cookie concoction and let it chill overnight. Then the day of we finished the cookies and delivered them to his Nana. He was so proud. It was actually quite difficult to come up with this recipe. He wanted something specific that didn't really exist as far as I could tell. He wanted cherry cookies that were hearts but not a sandwich cookie. I tried looking online at all kinds of cookie pictures with him to find what he wanted, nothing satisfied him. Then we went to the grocery store and tried to figure it out. He didn't like any of the chocolate frosting because "they would be too thick" he said. I told him a about a delicious treat called ganache and he said "that's exactly what I want!". He then decided that the cookies would be best with dried cherries. Well after all that we were ready to make cookies. I just started with a basic sugar cookie recipe and added his dried cherries. He wanted to add cherry flavoring to the cookies but since they don't sell that I convinced him to let me use almond extract because it gives a nice cherry like flavor. He did all the hard work, except the dishes. He even learned how to use the mixer.
He started out by chopping his dried cherries and gathering all the required ingredients.
He then measured out his ingredients and sifted the dry ingredients together. We used a fine sieve and whisked the ingredients together over large bowl.
Then we started "mixer 101" before I let him touch the stand mixer. I gave the over dramatic warning about sticking anything in the mixer while it is running. I told him it would rip his arm off.
He preceded to cream together the butter and sugar. Then adding the remaining ingredients until it made a nice homogeneous dough.
When it is all mixed up, you form the dough into two balls. I do this on top of the plastic wrap, set the second ball onto a second piece of plastic. Then loosely wrap the balls in plastic and squish until it makes a nice even disc. Repeat with the second ball, then wrap them tightly in the plastic wrap and refrigerate at least two hours. I let ours sit overnight because we didn't have time that night to finish them. Plus he wanted to give his Nana really fresh cookies.
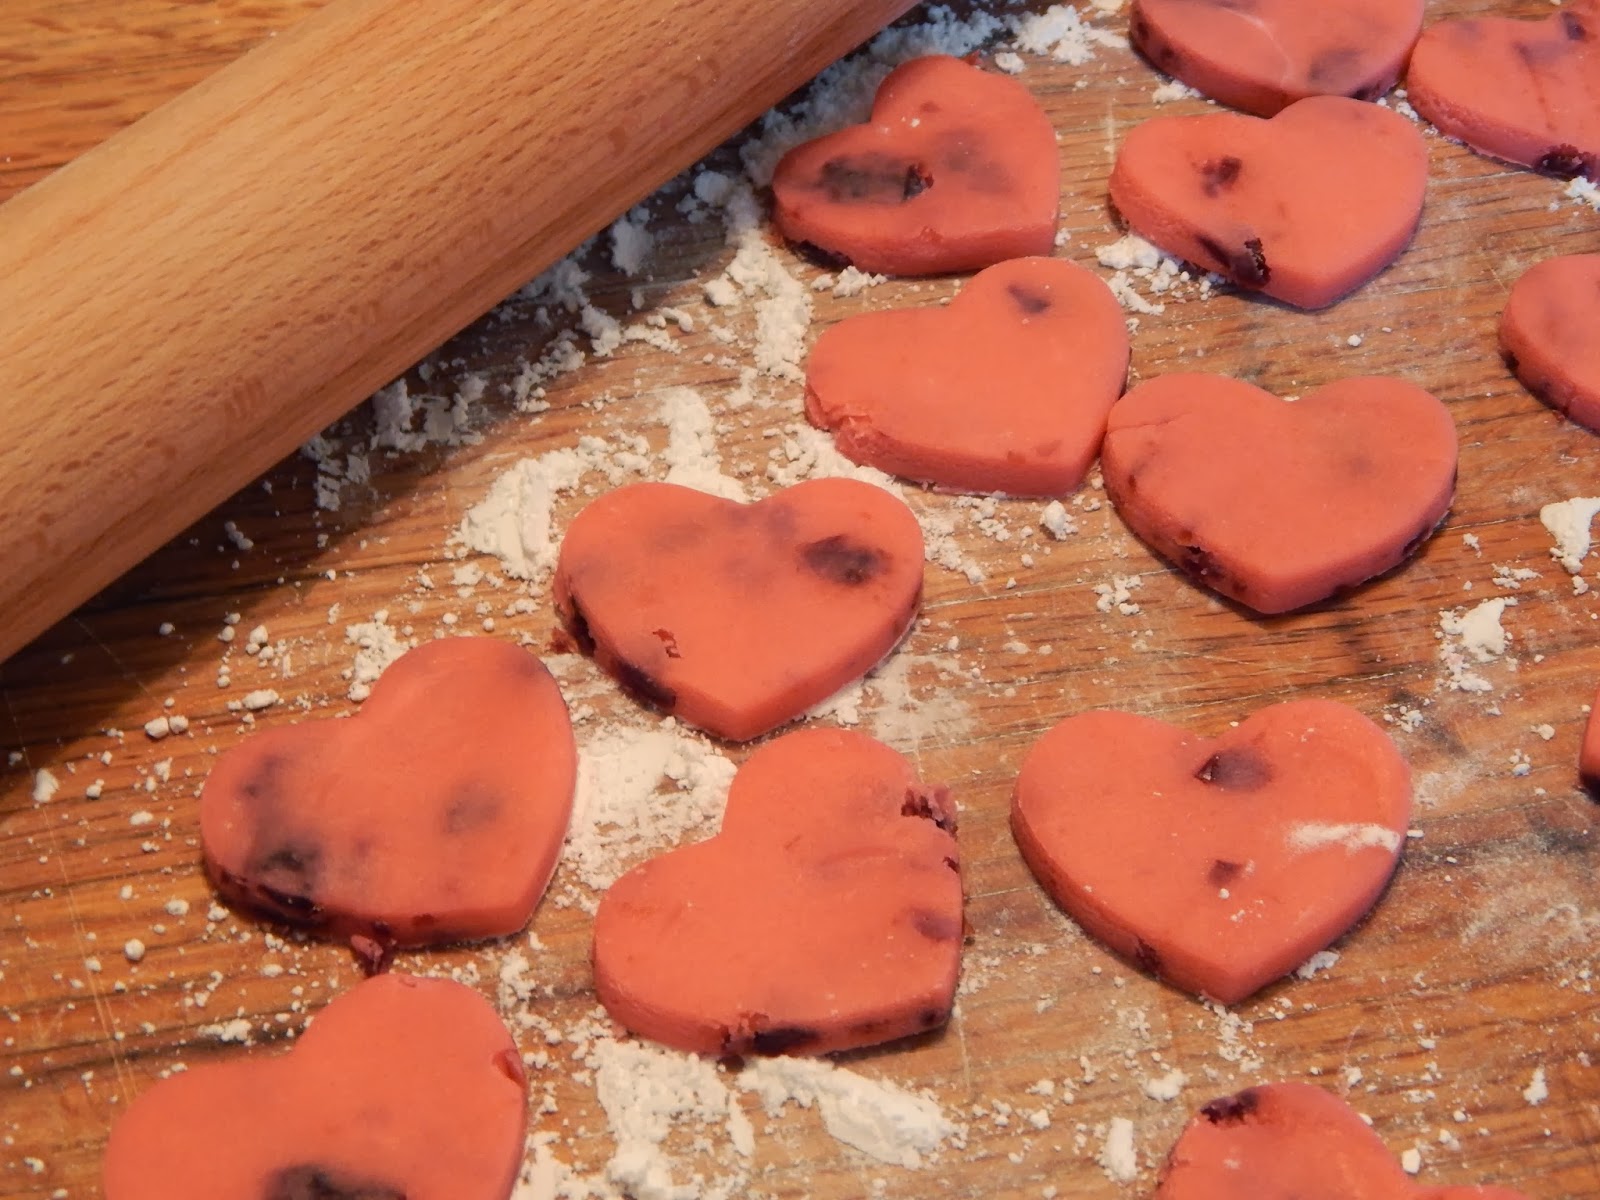
When we were ready to finish the cookies, we took out the dough one disc out at a time. Then he rolled out the dough and cut it into heart shapes. I sprinkled the clean/sanitized counter with powdered sugar, instead of flour, so that it wouldn't add a nasty flour taste.
We then baked the cookies on a lightly sprayed cookie sheet at 375 degrees until they were firm and lightly golden brown. Then we put them on a wire rack and let cool completely.
When the cookies were cool we made the ganache. It was so easy and delicious! He put the chocolate chips into a heat proof bowl while I warmed the heavy cream in a small pot until hot and bubbly. Then I poured it over the chocolate chips and let it set for 2 minutes. We then stirred the mixture together until it formed a smooth delicious chocolate sauce.
It is decorating time! I used a tablespoon to pour the chocolate onto the cookies. I also put the cookies onto a rack over a sheet pan (you could also use wax paper) so the extra chocolate could drip off. Munchkin added the sprinkles behind me immediately before the ganache set up.
After about an hour the ganache set up. At this point the cookies can be layered between wax paper (don't press, just lay them gently) and stored in an airtight container.
 |
| Ready for Nana. |
After all that I made a delicious valentine's dinner. While I was prepping dinner, I looked out our window and saw this beautiful bird. I had to stop and take a picture.
Our dinner started with fresh crostini topped with a goat's milk brie and a balsamic marinated tomato salad. Dinner consisted of scalloped potatoes, quinoa salad (watch for this recipe coming soon), steamed edamame and pepper crusted steak with a red wine mushroom sauce. Then for dessert we, of course, had cookies and Vietnamese style coffee.
 |
| Appetizer |
 |
| Scalloped Potatoes |
 |
| Dinner!! |
After dinner we drove down to Galveston for a family fun weekend. We had a great time with friends, family and beautiful weather. The boys fished, played horseshoes and crochet, then cooked fajitas. I was laid up with a hurt ankle so I took pictures and watched Olympic hockey :-)
 |
| What a beautiful night sky! |
Chocolate Covered Cherry Cookies
3 c Flour
3/4 tsp baking powder
1/4 tsp salt
1 c butter, softened
1 c sugar
1 egg
1 Tbsp milk
1 tsp almond extract
1 tsp pink food coloring
4 oz dried cherries, chopped
In a separate bowl sift together flour, baking powder and salt. In another small bowl combine the egg, milk, food coloring and almond extract in a small bowl by whisking with a fork. In the bowl of an electric mixer cream together butter and sugar until light and fluffy. Then add the egg mixture, mix on low until combined, scraping down the sides of the bowl when necessary. With the mixer on low, slowly add the flour mixture.When the dough is homogeneous, add the dried cherry pieces and mix on low until evenly distributed. Form the dough into two balls, then shape into disks and wrap in plastic wrap. Refrigerate for at least two hours (I let them set overnight).
When ready to cut out cookies, preheat oven to 375 degrees. Lightly spray a cookie sheet with non-stick spray and set aside. Remove one disk from refrigerator at a time. Lightly dust your cleaned/sanitized/dry work space with powdered sugar and roll dough out to 1/4 inch thickness. Be sure you move the dough around making sure it isn't sticking to counter top, then cut with desired cookie cutter. You may have to push hard if a cherry bit is along the edge of cutter. Place cookies on prepared cookie sheet, leaving 1-2 inches in between cookies. Bake for 10-15 minutes until very lightly browned on the edges. Remove to a wire rack and let cool completely before topping with ganache or frosting of choice. Repeat with remaining dough.
Ganache
1 c heavy cream
8 oz semi-sweet chocolate chips
Make ganache after cookies are cooled. Put chocolate chips in a heat proof bowl. Heat cream over medium heat until hot and lightly bubbling. Immediately pour over chocolate chips and let rest for 2 minutes. Then stir chocolate and cream together until all lumps are gone and it forms a beautiful glossy chocolate sauce.
Set cookies on a wire rack over a sheet pan or wax paper and using a spoon or tablespoon carefully pour ganache over cookies one at a time. Immediately top with sprinkle or desired decorations. Ganache will set up after about an hour. Cookies can be gently stacked between layers of wax paper after ganache has set up and store in an airtight container.
 So there is this "magical" little seed called quinoa. It eats like couscous, orzo or rice but it is actually a protein. I really like it but my family not so much. Then one day my husband had an epiphany and told me his idea to turn our favorite couscous salad into a healthier version with quinoa. He suggested it may even help him enjoy quinoa more. So I did my best to recreate the salad we always bought pre-made from our local HEB (grocery store). It's a Greek style salad with fresh basil, fresh spinach, lemon juice and best of all feta cheese.