Tuesday, December 10, 2013

Meyer Lemon Marmalade.....

So these past couple of days my little munchkin has been under the weather. So we have pretty much been watching PBS kids and Harry Potter. No school yesterday or today, but I think we will try tomorrow. Well to be fair I did make him "play" on raz-kids for awhile yesterday. So it has been a laid back week so far. However, I do want to share with you my experience making Food and Wine magazine's Meyer Lemon Marmalade recipe. Now this recipe takes 3 days total to make but it's actually pretty easy and doesn't have very much active time. You start by weighing out 2 pounds of lemons. I have a great digital scale  that I bought from Tuesday Morning for my husband's sausage making. I use it way more than he does and I totally recommend everyone have one, especially if you bake. I received a lot of free lemons at one time. Some came from my husband's lovely aunt's tree and a few more from a guy at his work. So they were really fresh, homegrown, Texas Meyer lemons. YUM YUM YUM! I love lemons and I love orange marmalade so when I received my magazine and this recipe was in it. It was meant to be! I had to make it. After you weigh out the lemons you just cut them all into eight wedges and soak in water overnight...that's it. One easy step for day one. I soaked them in my favorite enamel coated cast iron pan. I love this pot and use it for almost everything! Wrap the top in plastic and let it set.

The next day you bring the lemon wedges to a boil and cook for 2 hours until tender. I lost track of time so I am not sure how long they cooked but it was a long time. It still turned out fine. Then pour these out into a mesh strainer and let set out overnight to drain, of course wrap with plastic when cool.


 I then rinsed out my pot and put the second batch of lemons in it to soak overnight.(Still day two) These lemons you slice up very thinly into little triangles. Next time I think I will cut the lemons even smaller than suggested, just to make spreading the marmalade on toast a little easier.

Day three you discard the lemon wedges that were draining, keeping the liquid, then juice enough lemons for 1/4 cup of juice. Bring the little slices to a boil and reduce for about 40 minutes. Then add the reserved liquid, the lemon juice and sugar and cook until it passes the test described in the recipe. I had to cook mine 40 minutes longer than their minimum, about 70 minutes total. This makes a lot of marmalade but it is so good! It is a bit sour ( I may add more sugar nest time) but it's made of lemons so you do have to expect that. It is also strangely addictive.Miles and my husband have already eaten a whole jar. I am thinking of making orange marmalade this week, so we will see how that tastes.  This marmalade is great with buttered whole wheat toast. I am going to try it with a bagel and plain cream cheese next!

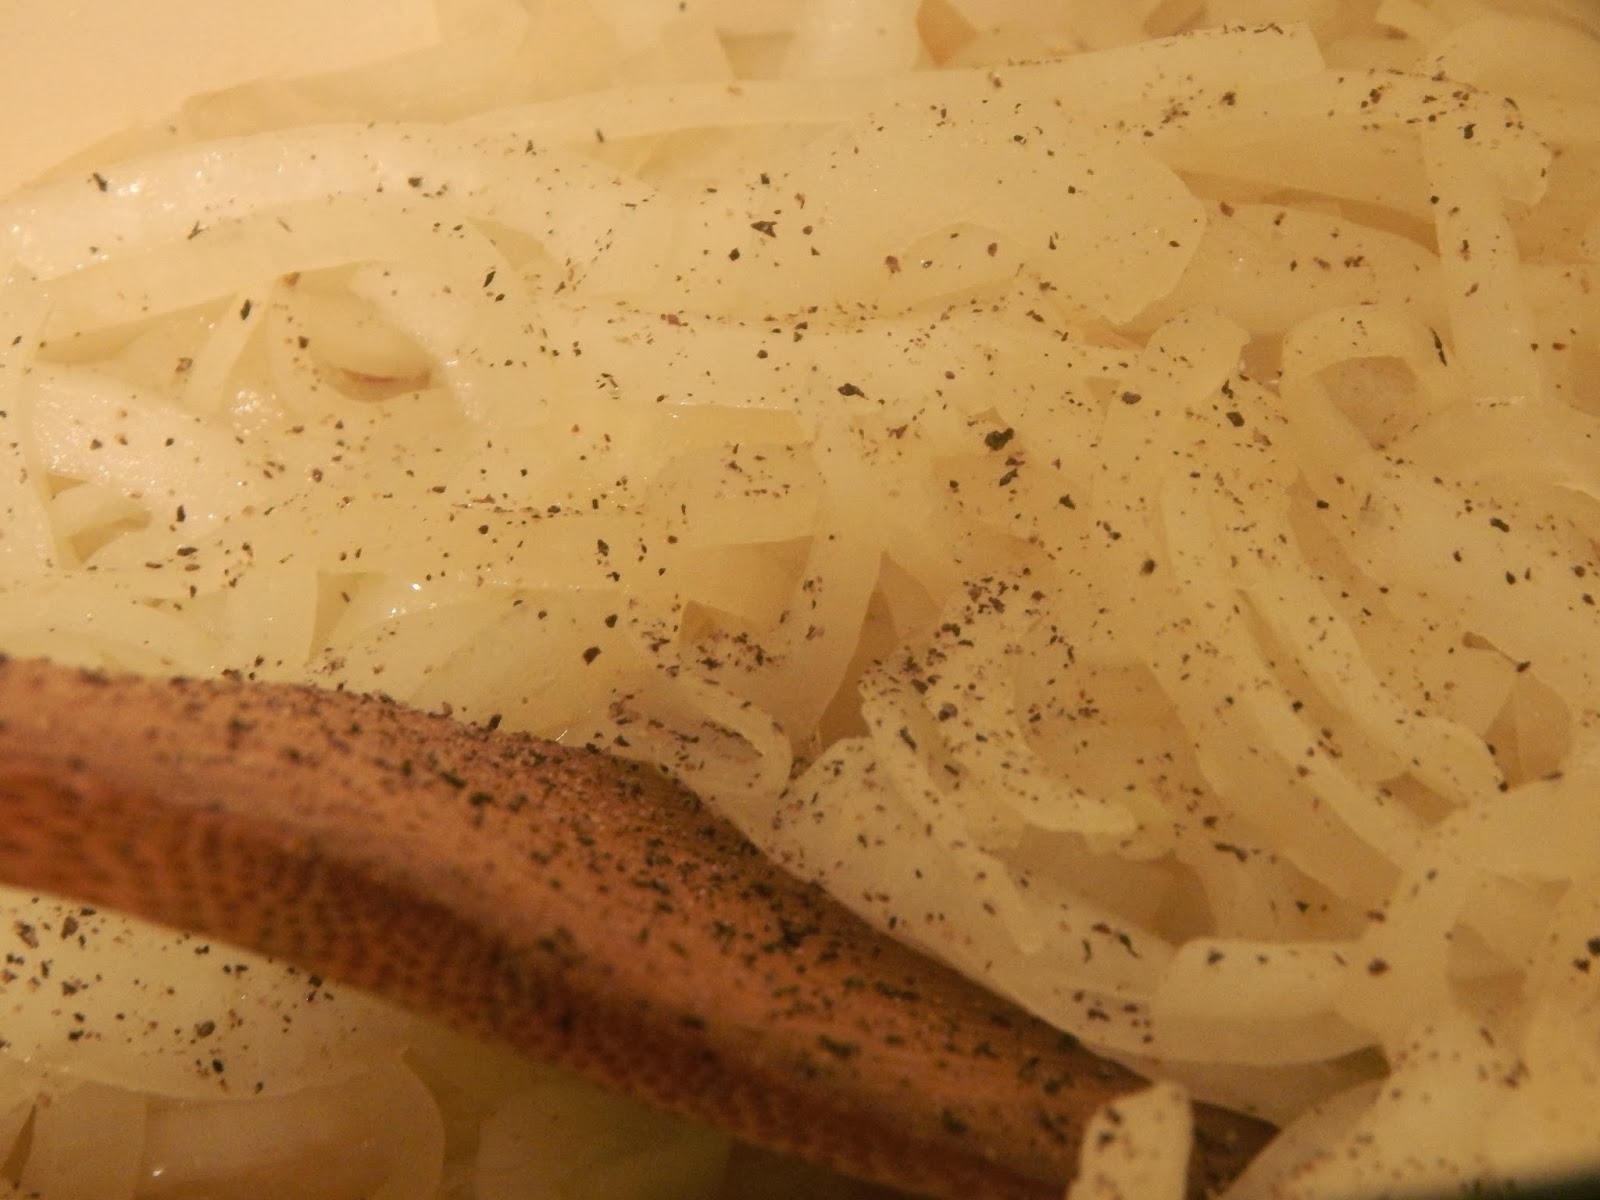
After 30 minutes of cooking. Reduced just a bit  
     
This is what it looked like when I first did the test.
See the foam, skim that off.
This is what it looked like when  it passed the test.

I used new and recycled jars. I love the little red
 jars. They are the perfect size.

     
Meyer Lemon Marmalade

2 pounds Meyer lemon, cut lengthwise into 8 wedges each
2 pounds Meyer lemons, lengthwise into 8 wedges each, seeded and very thinly sliced crosswise
7 1/2 cups sugar (3 1/4 pounds)
1/4 cup fresh lemon juice
Ten 1/2-pint canning jars with lids and rings, sterilized in boiling water

Day 1
 in a large nonreactive saucepan, cover the lemon wedges with 2
inches of water (about 8 cups) and let stand at room temperature overnight.

Day 2
Bring the lemon wedges to a boil. Simmer over moderate heat, stirring every 30 minutes, until the lemons are very tender and the liquid is reduced by half, about 2 hours and 15 minutes. Pour the lemon wedges into a
sieve set over a large heatproof bowl; let cool completely. Wrap the fine sieve and bowl with plastic and let drain overnight at room temperature; discard the lemon wedges. Meanwhile, in a large saucepan, cover the Meyer lemon slices with 1 inch of water (about 4 cups) and let stand at room temperature
overnight.

Day 3
Bring the Meyer lemon slices to a boil and simmer over moderate heat, stirring occasionally, until the lemons are very tender and the cooking liquid is slightly reduced, about 40 minutes. Add the strained liquid, the sugar and the lemon juice, then bring to a boil. Simmer over medium heat, without stirring (it's hard to do I know), until the mixture darkens slightly, about 30 minutes; skim off any foam as necessary. Test to see if it's ready.

TEST
Spoon 1 tablespoon of the marmalade onto a chilled plate (I stuck my plate in the freezer to chill) and refrigerate about 3 minutes; the marmalade is ready when it thickens like jelly and a spoon leaves a trail when dragged through it. If not ready continue simmering and testing every 10 minutes until it passes the test, up to 1 hour and 30 minutes.(I did an additional 40 minutes)

Ladle the marmalade into the jars, leaving 1/4 inch of space at the top and screw on the lids. Using silicone or canning tongs, lower the jars into a large pot of boiling water and boil for 15 minutes. Do not fill the pot up too much because the jars will displace a lot of water. Remove the jars with the tongs and let stand until the lids seal. I set mine on a towel to cool and dry. I let mine cool overnight on the counter. Don't let the kids touch the jars. They hold their heat for quite some time. Marmalade can be stored in a cool, dark place for up to 6 months.
The final product is beautiful and delicious!!!


Here is the original recipe:
 http://www.foodandwine.com/recipes/meyer-lemon-marmalade-rachel-saunders

Saturday, December 7, 2013

French Onion Soup...

I can't believe I haven't posted anything all week, I feel like such a slacker. This week we had a full week of  school. No holiday interruptions or weekday obligations to distract us, it was nice. We were able to maintain focus and complete all our "assignments". We started using a new math program, a FREE website called Khan Academy. (www.khanacademy.org)When you sign up it gives you a pretest to figure out your skill level and then it adjusts the program accordingly. You can learn new math skills, then take quizzes and it slowly builds up your mastery. Miles and I both have an account because I think it's kind of fun. In addition to school work we cleaned out his bedroom on Wednesday to make room for Christmas gifts and to donate his undesired toys to charity. Lost treasures were found and Miles made a secret hide-out out of a water heater box. He put a little blanket pallet inside and sat there listening to his Fellowship of the Ring audio book. If you have never checked a playaway out of the library, you should. It is a portable audio device that is pre-loaded with a book. All you have to do is plug in speakers or headphones. I even listen to them through my car stereo. They are his favorite thing to check out, besides DVDs. He even did a little school work inside the not so secret hide-out.


Also this week, Miles decided that he wanted to go to Tae Kwon Do class every day after school, so we tried it out. It is a bit of an adjustment to dedicate time every night to this. But I believe it will be good for him especially since the weather has been too cold and wet to play outside. This new schedule meant that my dinners would have to be a bit more rushed than usual. I made leftover Thanksgiving turkey enchiladas on Tuesday. They were so good! Then on Thursday I made French onion soup. With a few leftover nights in between. I don't know why but when I woke up on Thursday I was craving soup. And of course, one of my favorite soups is French onion soup. So I just had to make it. After school, I sliced up 6 onions, got out my handy cast iron soup pot and started sauteing. The onions were seasoned with salt and freshly ground pepper, then cooked part way. I paused the cooking process, covered the pot and left for Tae Kwon Do. 

When we returned, I cranked the heat back up and started to caramelize. Caramelizing the onions takes a long time, like 45 minutes, so be patient. Keep it low, stir occasionally and remember to be patient. It will be worth it I guarantee it. I wasn't as patient as I should have been and the onions were not quite caramelized to my satisfaction but I was hungry.

I recommend cooking them longer than the picture above. Probably like 15 minutes longer. They will be soft and dark brown (not burnt). At this point I added the Worcestershire sauce and white wine to deglaze the pan. I cooked this down until the wine was reduced by half, about 5 minutes, then added the thyme, beef broth and more freshly ground pepper.( I like a lot of pepper, so you may want less)


While the soup was cooking I sliced some bread, brushed it with olive oil, seasoned it, and toasted it in the oven until lightly golden brown. I then topped the toasted bread with cheese and threw it in the oven on broil, under constant supervision, until the cheese was melted. If you prefer, you can put soup into individual oven safe serving bowls right before serving and top with the toasted bread, then the cheese mixture and broil the whole bowl for a couple minutes until the cheese is bubbly and delicious. I don't particularly like soggy bread so I melt the cheese onto the bread separately and then toss a couple into my soup as I eat it. The bread stays crispy longer this way. 


The weather got really cold on Thursday and it was so nice to have a big pot of soup. We had this with hot tea and baked potatoes. It is the perfect winter comfort food.

French Onion Soup
makes 6-8 servings

6 onions, cut in half and sliced thinly lengthwise
3 Tbsp olive oil
salt 
fresh ground pepper
1 c dry white wine (I used wine from my old job at the winery, it was a Chardonnay)
2 Tbsp Worcestershire sauce
8 c beef broth
7 sprigs fresh thyme

Croutons
1 baguette, sliced
olive oil
salt 
freshly ground pepper
shredded Swiss cheese
shredded Parmesan cheese

Preheat oven to 350 degrees. In a heavy bottom sauce pot, heat olive oil over medium heat. Then add the sliced onions, salt, and pepper. Saute over medium low heat about 45 minutes until they are really soft and lightly browned. Add the Worcestershire sauce and wine. Scrape the bottom of the pan to deglaze and remove any brown bits from the bottom of the pan. Cook this down until reduced by half, then add the beef broth, and thyme. Bring to a boil, then simmer for 30-45 minutes and season to taste.

While soup is simmering prepare the croutons. Slice the baguette into 1/2 inch pieces and arrange bread on a sheet pan, brush with olive oil and season with salt and pepper to taste. Toast in oven until lightly brown, remove bread from oven and turn it up to broil. Top bread with cheeses and return to oven and cook until cheese is browned and bubbly.

Serve up soup and top with cheesy croutons. YUM!


Saturday, November 30, 2013

Duck "poppers".....

This weekend has been great, filled with lots of family time. Miles and I are enjoying a very rare four day weekend with my husband. Friday was spent relaxing, playing outside, and eating leftovers...of course. Several pumpkins were left from my brother's wedding, fall decorating and Halloween. Miles wanted to have archery target practice with one and it was the perfect day. Afterwards he tried out pumpkin carving with his new pocket knife.


While the boys played I took a little walk around our yard. It was such a gorgeous day. My father in law has an amazing garden that grows lots of delicious food right near my house. This year he planted a fall garden after the summer garden quit prodicing. Currently it is full of cabbages, lettuces and greens aplenty. I only have a small porch garden with mostly herbs with one pequin pepper plant.Unlike his garden, it is on its way out for the season. My herb plants did provid me with lots of great  fresh herbs all summer and most of the fall. On the other side of his garden is a peaceful little pond that usually has birds, turtles, dragonflies and fish. I tried to get a picture of some of our pond wildlife but they all escaped before my camera was ready. 


Duck Breast in Marinade
Today has been more of an indoor day, although it was just as beautiful outside. We made homemade yogurt (not sure if this worked yet), lasagna and duck jalapeno "poppers". My brother-in-law went hunting a couple days prior to Thanksgiving  and brought home some ducks. He made fresh duck "poppers" as a pre-dinner appetizer on Thursday. Man they were so delicious!! He had a few extra duck breasts left so he gave them to me. I asked for his recipe and this is my attempt. My version turned out pretty great but his were way better. Three reasons why his were better; they were cooked on the BBQ, he put regular yellow onions in them (I had shallots) and he used plain bacon (I only had maple). When he gave me the duck breasts, all the hard work had been done. They were even already marinated in what looked like Italian dressing. Per his instructions I cut the duck into bite sized pieces, then sliced up some fresh jalapenos, cream cheese, and shallots. Now everything was ready to wrap and skewer. I only had bacon ends and pieces (my husband uses it make homemade sausage) and for some reason it is maple flavored. I have never like maple bacon, so I would choose regular or even peppered bacon instead. 
Stacked up and ready to roll

My brother in law suggested using two tooth picks to hold the bacon on. I found this worked quite well, although a lot of the cheese still came out. However, this was due to the bacon pieces being so inconsistent, it was really hard to nicely wrap each piece. I then baked them until the bacon was crispy and brown. YUM YUM YUM!! I think they would be great for any kind of BBQ, the super bowl or as a tailgating treat. I am sure they could even be made using any kind of meat.

Duck "poppers"

1 pkg cream cheese, cut into small pieces
3 fresh jalapenos, seeded and thinly sliced
1 onion, cut into small pieces
4 small duck breasts, cut into bite sized pieces
1 pkg bacon of choice, slices cut into thirds

Preheat oven to 350 degrees or light and heat grill. Make an assembly line of ingredients. This ensures that when your hands are covered in raw meat you don't have to go searching around for anything. Lay out 1 piece of bacon, top it with one bit of duck, cream cheese, jalapeno, and onion. Wrap the bacon around horizontally, securing it with a toothpick. Then wrap it vertically with another piece of bacon and secure with a toothpick. Repeat with remaining ingredients. Bake or grill until bacon is browned and crispy.


Thursday, November 28, 2013

Cajun "Fried" Turkey....

This turkey has become a tradition. It's cooked in a infrared propane cooker and tastes like it has been under a rotisserie after it's cooked. You have to start thawing your bird in the refrigerator four days ahead. When it is thawed open the turkey wrapping over a sheet pan or clean sink because there will be liquid inside. Remove the neckbone, organs and sometimes a gravy packet from the cavity of the turkey. Our turkey had some in the back end and some in the front end. Set it aside for soup or gravy or whatever you like. Rinse the turkey under cool water, then pat dry and set on a sheet pan. Then season it up. Massage the rub up under the skin, the on top of the skin and in all the nook and crannies of every part of the bird. We the inject it some sort of flavored butter. Tie up the wings and legs so the don't hang loose and burn. Then we let it sit a couple of hours, until it was time to head to my sister in law's to cook the bird. It takes about 2 to 2 1/2 hours to cook in our cooker.


Preheat the cooker, set the turkey in the basket, insert a probe thermometer into the thickest part of the meat. We prefer a digital probe thermometer but we forgot it at our house so we used a regular food thermometer stuck into the breast so we could keep an eye on it. When it reached 165 degrees, it was ready to pull and set to rest for 15 minutes.


I like to cut out the whole breast and thinly slice it, the cut off the individual dark meat parts, like the wing, thigh and leg. Arrange it nicely on a platter, if you can before it's served. I couldn't even get it partially cut before little fingers were snatching it off the tray. 

All the food was great! I ate way more than I should have and enjoyed every bite. So Happy Thanksgiving and I hope yours was as great as mine.

Turkey Veggie Tray (delicious and adorable but not made by me)
Bon Appetit (my favorite magazine ever!!!!) Cajun Seasoning

5 Tbsp Kosher Salt
2 Tbsp Cayenne Pepper
2 Tbsp Garlic Powder
2 Tbsp Sweet Paprika
1 Tbsp Dried Oregano
1 Tbsp Dried Thyme
1 Tbsp Black Pepper
1 Tbsp Onion Powder

Stir these all together in a small bowl with an airtight lid.


Brownie ice cream cake....

My nephew's favorite cake is a brownie topped with chocolate ice cream and frosted with whipped topping. I made my favorite brownie recipe in an 8 inch square pan. After it was cool enough to remove from the pan, I removed it to a cooling rack and lined the same pan with plastic wrap (no need to wash it) to mold the ice cream. I prefer to use parchment paper for this step but I didn't have any so I used plastic wrap.


At this point, pull the ice cream out to soften, but don't let it melt. You want to be able to press it into the pan, which is your mold. Then smooth the ice cream until it is even. You may need to hold onto the plastic wrap a bit so it won't slide out. Then return it to the freezer to refreeze.

I used my bamboo cutting board for the cake's board because it's strong. Since it's going to family, I know I will get my board back. If you don't have one, get two or three pieces of appropriately sized cardboard, stack them on top of each other, tape them together and wrap it in foil. Put the brownie layer on the bottom, then unmold the ice cream by pulling up on the plastic wrap. I  used a cutting board to flip the ice cream out on, then I slid it off onto the brownie cake. Stick it back in the freezer to firm up again. Leave the plastic wrap on at this point. After about an hour it should be ready to pull out and cover in whipped topping. Remove the plastic wrap and working quickly cover the entire cake in whipped topping. You don't have time to be perfect unless your house is pretty cold. I saved a little whipped topping out to tint with food coloring to write happy birthday and add a border. Just remember whatever color you use will come out pastel. I chose green. Put it back in the freezer until ready to serve.


I didn't get a picture of the birthday boy enjoying his cake, but all the kiddos ate it and as far as I know it was a great success. So happy birthday Joey, you are sweet kid who deserves this special cake!

Ghirardelli's Chocolate Brownies
Makes 16 brownies

1/2 c Semi-sweet chocolate chips (get the best you can afford)
4 oz Semi-sweet baking bar (same deal here)
1/2 c Butter, cut into pieces
1 c Firmly packed brown sugar
1 Tbsp pure(never imitation) vanilla extract
2 Eggs
3/4 c + 2 Tbsp AP Flour
1/4 tsp Baking powder
3/8 Tsp Salt

Preheat oven to 350 degrees, prepare an 8 inch square pan by lightly buttering it.Chop 4 oz chocolate and melt over double boiler until smooth. Remove from heat and set aside to cool. Stir in vanilla and brown sugar. Add eggs and mix well. In a separate bowl sift together the dry ingredients. Slowly add sifted dry ingredients into the egg/chocolate mixture. Fold in chocolate chips, then pour into prepared pan. Bake for 25-30 minutes.


Pumpkin Bread...

Miles and I had cooking school yesterday. It was such a fun day! Last week during our lunch break we watched "The Chew" and Michael Symon made Chocolate Pumpkin Bread, well Miles just had to make it. We already had all the ingredients, including a pumpkin that needed to be cooked and eaten, so we made it. It turned out great! I also made my nephew's birthday cake (a brownie, ice cream, cool whip cake), which was actually pretty fun, a much better experience than the last time I made the same cake. Then it was on to turkey prep, which of course Miles had absolutely no interest in helping with. Everything turned out just like I wanted...except the giant pile of dishes.

The pumpkin bread was really Miles's baby, he helped clean out the pumpkin, roast it, peel it, measure out the ingredients....well everything. I just guided him and took it out when it was ready. I cut off the stem end of the pumpkin, cut it in half, scraped out the guts, and then lightly oiled a cookie sheet. I place the pumpkin, skin side up, on the pan and roasted it at 350 degrees for about 30 minute, until it is lightly browned and soft. We did this a couple days ahead of time. Then the day of we peeled it, then pureed the pumpkin in my food processor. It wasn't quite wet enough to mix thoroughly, so I added a little eggnog to loosen it up enough to blend into a smooth puree.


 This makes the pumpkin puree needed for the recipe, I am sure you could use a can of pumpkin, but like I said we already had a pie pumpkin that needed to be eaten. Measure out 1 1/2 cups for recipe, I froze the rest for a future recipe. We then assembled the recipe according to the original directions. Miles did all the work, he is a great helper. He mixed all the ingredients together and folded in the candies.(I think it would be just as good without the candy, but don't tell Miles)


Pour it all into the pan and bake. It made the whole house smell amazing! Let it cool for as long as you can stand it, then slice and enjoy.